The Basics of Google Cloude Compute


1. IT SPEAKS! CREATE SYNTHETIC SPEECH USING TEXT-TO-SPEECH (GSP222)
Overview
The Text-to-Speech API lets you create audio files of machine-generated, or synthetic, human speech. You provide the content as text or Speech Synthesis Markup Language (SSML), specify a voice (a unique ‘speaker’ of a language with a distinctive tone and accent), and configure the output; the Text-to-Speech API returns to you the content that you sent as spoken word, audio data, delivered by the voice that you specified.
In this lab you will create a series of audio files using the Text-to-Speech API, then listen to them to compare the differences.
Objectives
In this lab you use the Text-to-Speech API to do the following:
- Create a series of audio files
- Listen and compare audio files
- Configure audio output
Setup and Requirements
Note: Use an Incognito (recommended) or private browser window to run this lab. This prevents conflicts between your personal account and the student account, which may cause extra charges incurred to your personal account.
Note: Use only the student account for this lab. If you use a different Google Cloud account, you may incur charges to that account.
How to start your lab and sign in to Google Cloud Console
- Click the Start Lab button. If you need to pay for the lab, a dialog opens for you to select your payment method. On the left is the Lab Details pane with the following:
- The Open Google Cloud console button
- Time remaining
- The temporary credentials that you must use for this lab
- Other information, if needed, to step through this lab
-
Click Open Google Cloud console (or right-click and select Open Link in Incognito Window if you are running the Chrome browser).
The lab spins up resources, and then opens another tab that shows the Sign in page.
Tip: Arrange the tabs in separate windows, side-by-side.
Note: If you see the Choose an account dialog, click Use Another Account.
-
If necessary, copy the Username below and paste it into the Sign in dialog.
"Username"You can also find the Username in the Lab Details pane.
-
Click Next.
-
Copy the Password below and paste it into the Welcome dialog.
"Password"You can also find the Password in the Lab Details pane.
-
Click Next.
Important: You must use the credentials the lab provides you. Do not use your Google Cloud account credentials.
Note: Using your own Google Cloud account for this lab may incur extra charges.
-
Click through the subsequent pages:
- Accept the terms and conditions.
- Do not add recovery options or two-factor authentication (because this is a temporary account).
- Do not sign up for free trials.
After a few moments, the Google Cloud console opens in this tab.
Note: To access Google Cloud products and services, click the Navigation menu or type the service or product name in the Search field.

Active Cloud Shell
Cloud Shell is a virtual machine that is loaded with development tools. It offers a persistent 5GB home directory and runs on the Google Cloud. Cloud Shell provides command-line access to your Google Cloud resources.
-
Click Activate Cloud Shell at the top of the Google Cloud console.
- Click through the following windows:
- Continue through the Cloud Shell information window.
- Authorize Cloud Shell to use your credentials to make Google Cloud API calls.
When you are connected, you are already authenticated, and the project is set to your Project_ID,
PROJECT_ID. The output contains a line that declares the Project_ID for this session:Your Cloud Platform project in this session is set to "PROJECT_ID"gcloud is the command-line tool for Google Cloud. It comes pre-installed on Cloud Shell and supports tab-completion.
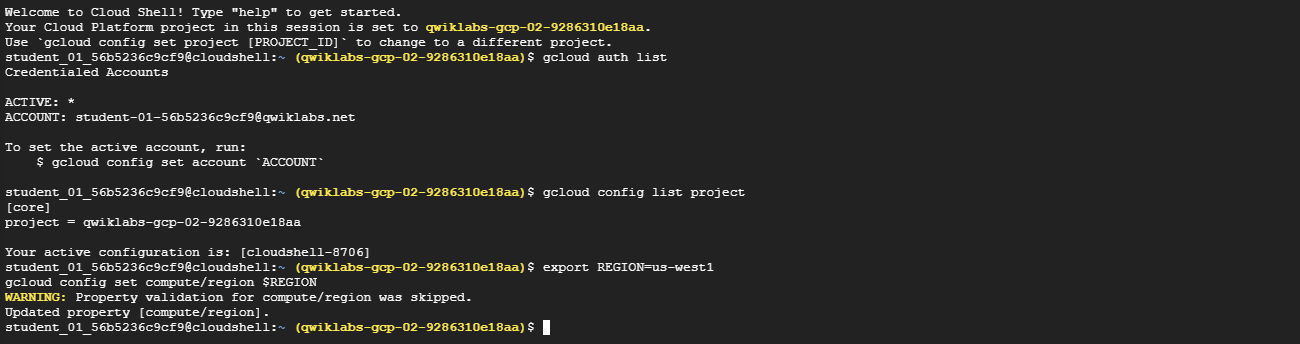
- (Optional) You can list the active account name with this command:
gcloud auth list -
Click Authorize.
Output:
ACTIVE: * ACCOUNT: "ACCOUNT" To set the active account, run: $ gcloud config set account `ACCOUNT` -
(Optional) You can list the project ID with this command:
gcloud config list projectOutput:
 [core]
 project = "PROJECT_ID"
Note: For full documentation of gcloud, in Google Cloud, refer to the gcloud CLI overview guide.
Set the region and zone
-
Run the following command to set the project region for this lab:
gcloud config set compute/region REGION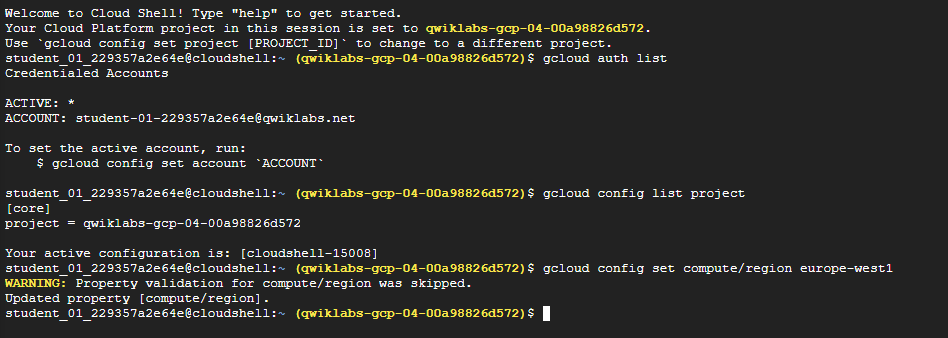
Learn more from the Regions and zones documentation.
Note: When you run gcloud on your own machine, the config settings are persisted across sessions. But in Cloud Shell, you need to set this for every new session or reconnection.
Task 1. Enable the Text-to-Speech API
-
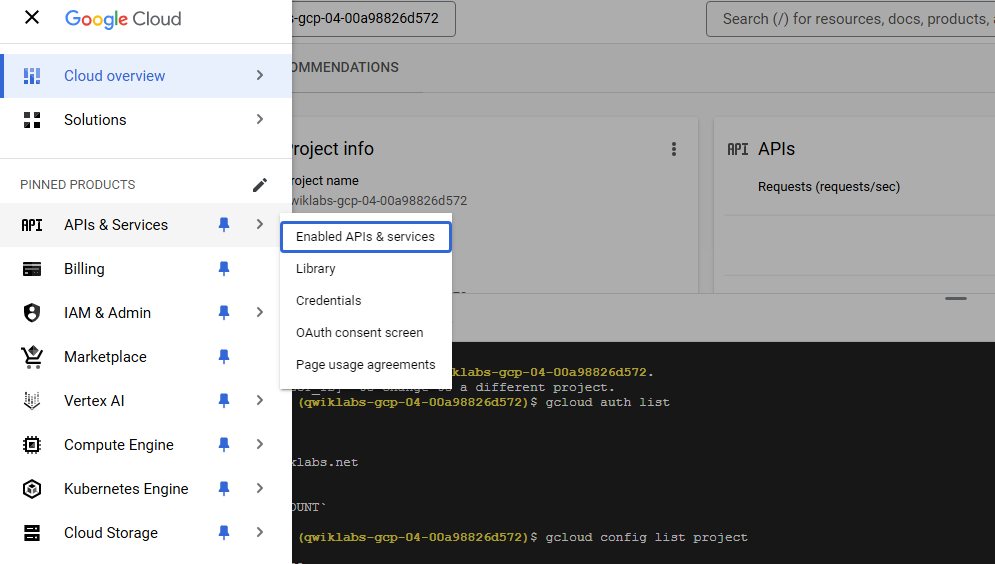
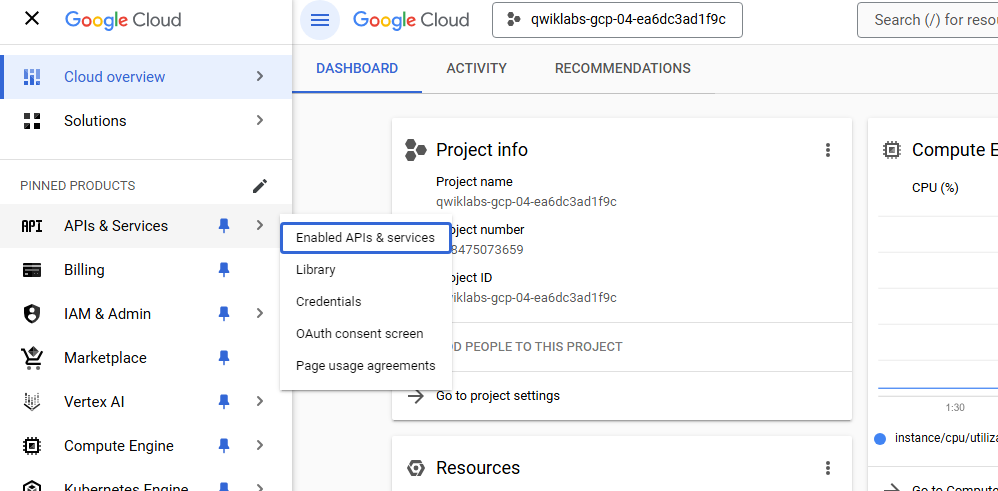
In the Navigation menu, click APIs and Services > Enable APIs and Services.
-
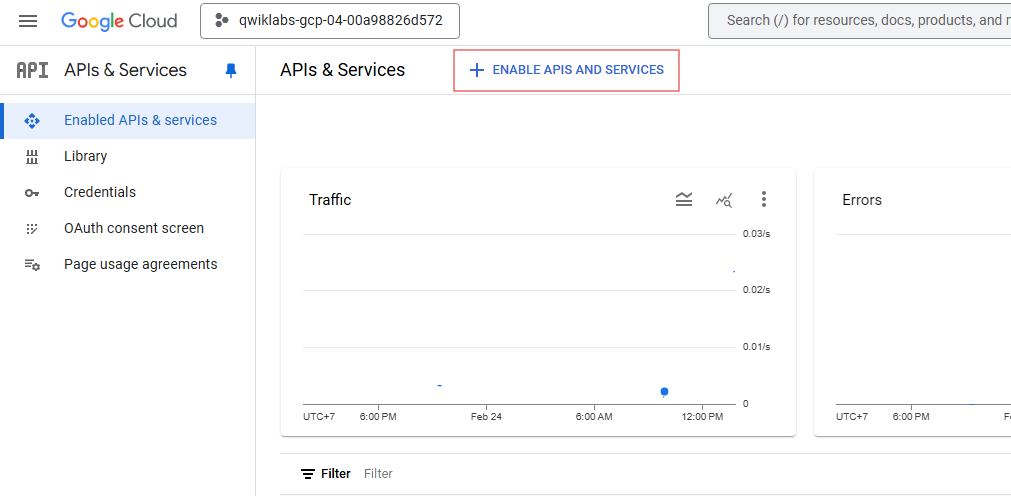
On the top of the Dashboard, click + Enabled APIs and Services.
-
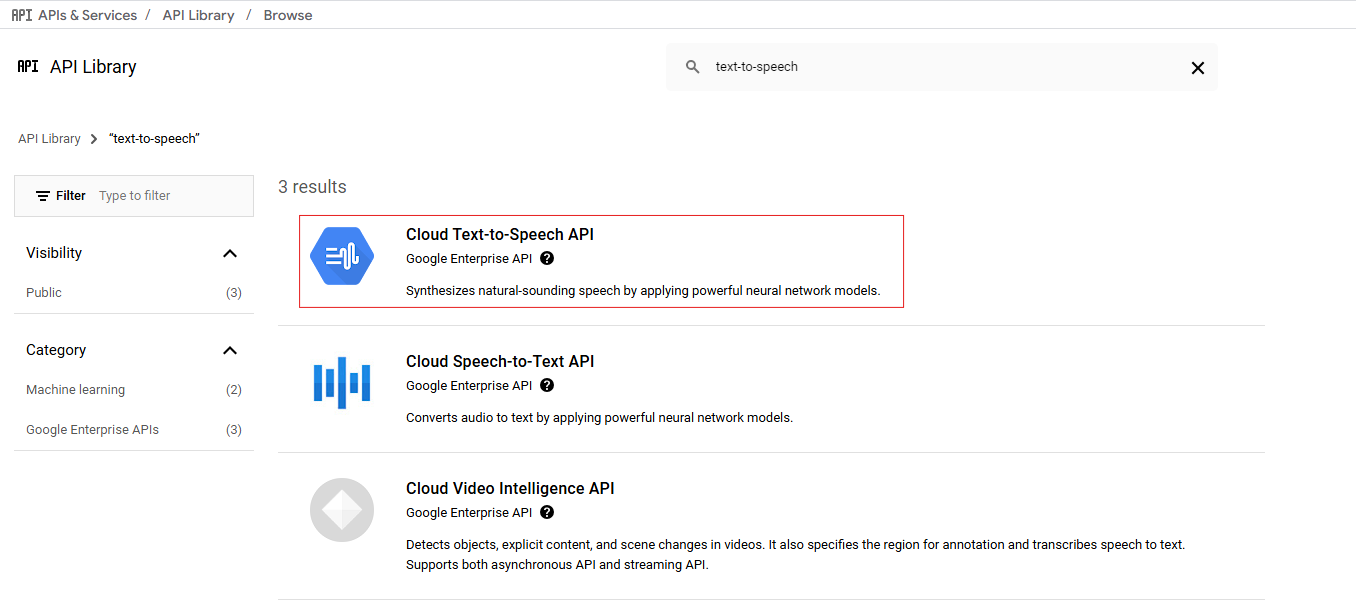
Enter
text-to-speechin the search box.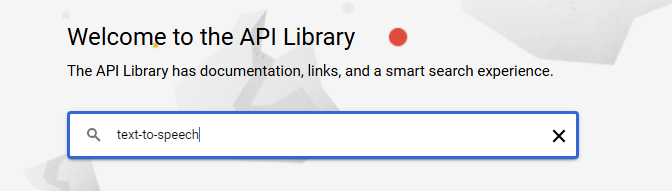
-
Click Cloud Text-to-Speech API.
-
Click Enable to enable the Cloud Text-to-Speech API.
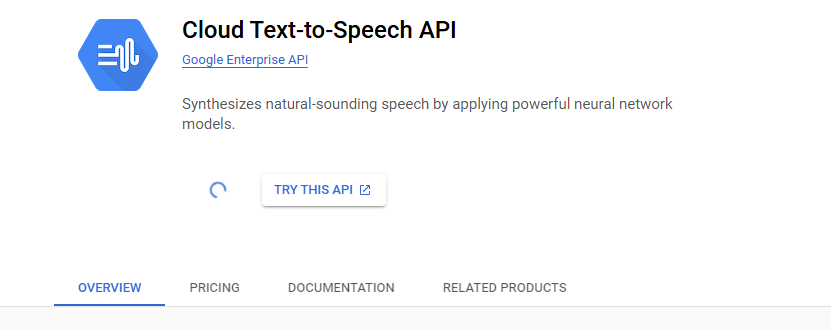
Wait for a few seconds for the API to be enabled for the project. Once enabled, the Cloud Text-to-Speech API page shows details, metrics and more.

Task 2. Create a virtual environment
Python virtual environments are used to isolate package installation from the system.
-
Install the virtualenv environment:
sudo apt-get install -y virtualenv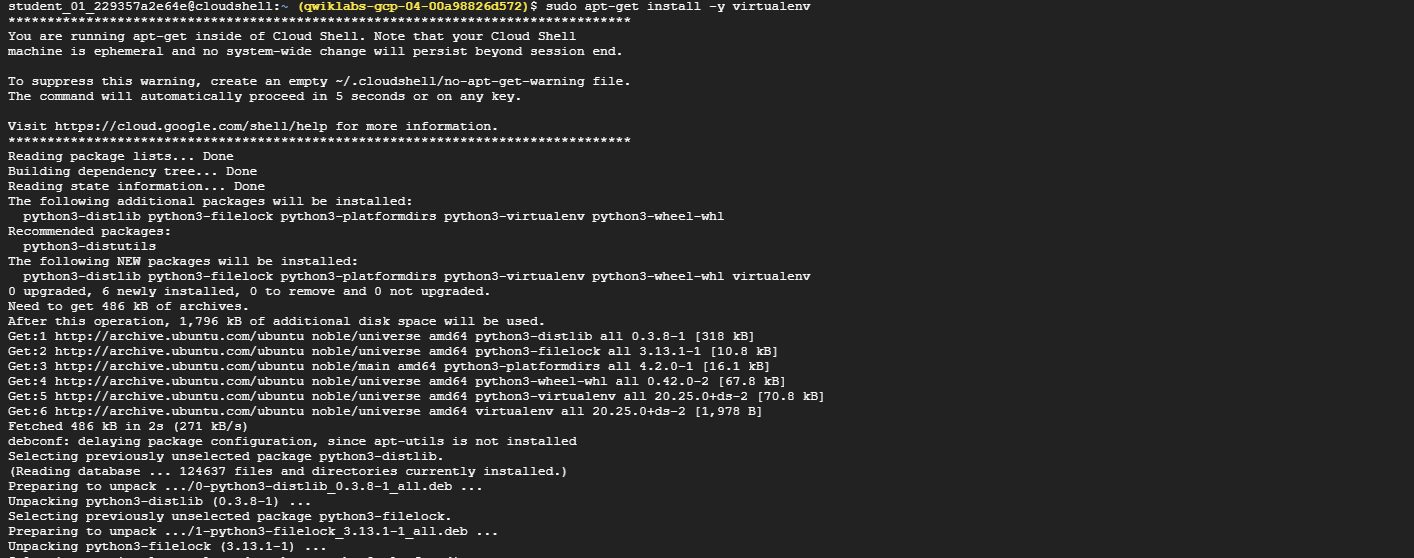
-
Build the virtual environment:
python3 -m venv venv -
Activate the virtual environment:
source venv/bin/activate
Task 3. Create a service account
You should use a service account to authenticate your calls to the Text-to-Speech API.
-
To create a service account, run the following command in Cloud Shell:
gcloud iam service-accounts create tts-qwiklab -
Now generate a key to use that service account:
gcloud iam service-accounts keys create tts-qwiklab.json --iam-account tts-qwiklab@Project ID.iam.gserviceaccount.com -
Finally, set the
GOOGLE_APPLICATION_CREDENTIALSenvironment variable to the location of your key file:export GOOGLE_APPLICATION_CREDENTIALS=tts-qwiklab.json
Task 4. Get a list of available voices
As mentioned previously, the Text-to-Speech API provides many different voices and languages that you can use to create audio files. You can use any of the available voices as the speaker for your content.
Note: The Text-to-Speech API includes several premium voices, known as WaveNet voices, that generate more natural-sounding synthetic speech. These voices are also a bit more expensive than other available voices. Refer to the Cloud Text-to-Speech pricing page for more details.
-
The following curl command gets the list of all the voices you can select from when creating synthetic speech using the Text-to-Speech API:
 curl -H "Authorization: Bearer "$(gcloud auth application-default print-access-token) \
     -H "Content-Type: application/json; charset=utf-8" \
     "https://texttospeech.googleapis.com/v1/voices"
The Text-to-Speech API returns a JSON-formatted result that looks similar to the following:
 {
 "voices": [
     {
         "languageCodes": [
             "es-ES"
         ],
         "name": "es-ES-Standard-A",
         "ssmlGender": "FEMALE",
         "naturalSampleRateHertz": 24000
     },
     {
         "languageCodes": [
             "ja-JP"
         ],
         "name": "ja-JP-Standard-A",
         "ssmlGender": "FEMALE",
         "naturalSampleRateHertz": 22050
     },
     {
         "languageCodes": [
             "pt-BR"
         ],
         "name": "pt-BR-Standard-A",
         "ssmlGender": "FEMALE",
         "naturalSampleRateHertz": 24000
     },
     ...
 ]
 }
Looking at the results from the curl command, notice that each voice has four fields:
- name: The ID of the voice that you provide when you request that voice.
- ssmlGender: The gender of the voice to speak the text, as defined in the SSML W3 Recommendation.
- naturalSampleRateHertz: The sampling rate of the voice.
- languageCodes: The list of language codes associated with that voice.
Also, notice that some languages have several voices to choose from.
-
To scope the results returned from the API to just a single language code, run:
 curl -H "Authorization: Bearer "$(gcloud auth application-default print-access-token) \
     -H "Content-Type: application/json; charset=utf-8" \
     "https://texttospeech.googleapis.com/v1/voices?language_code=en"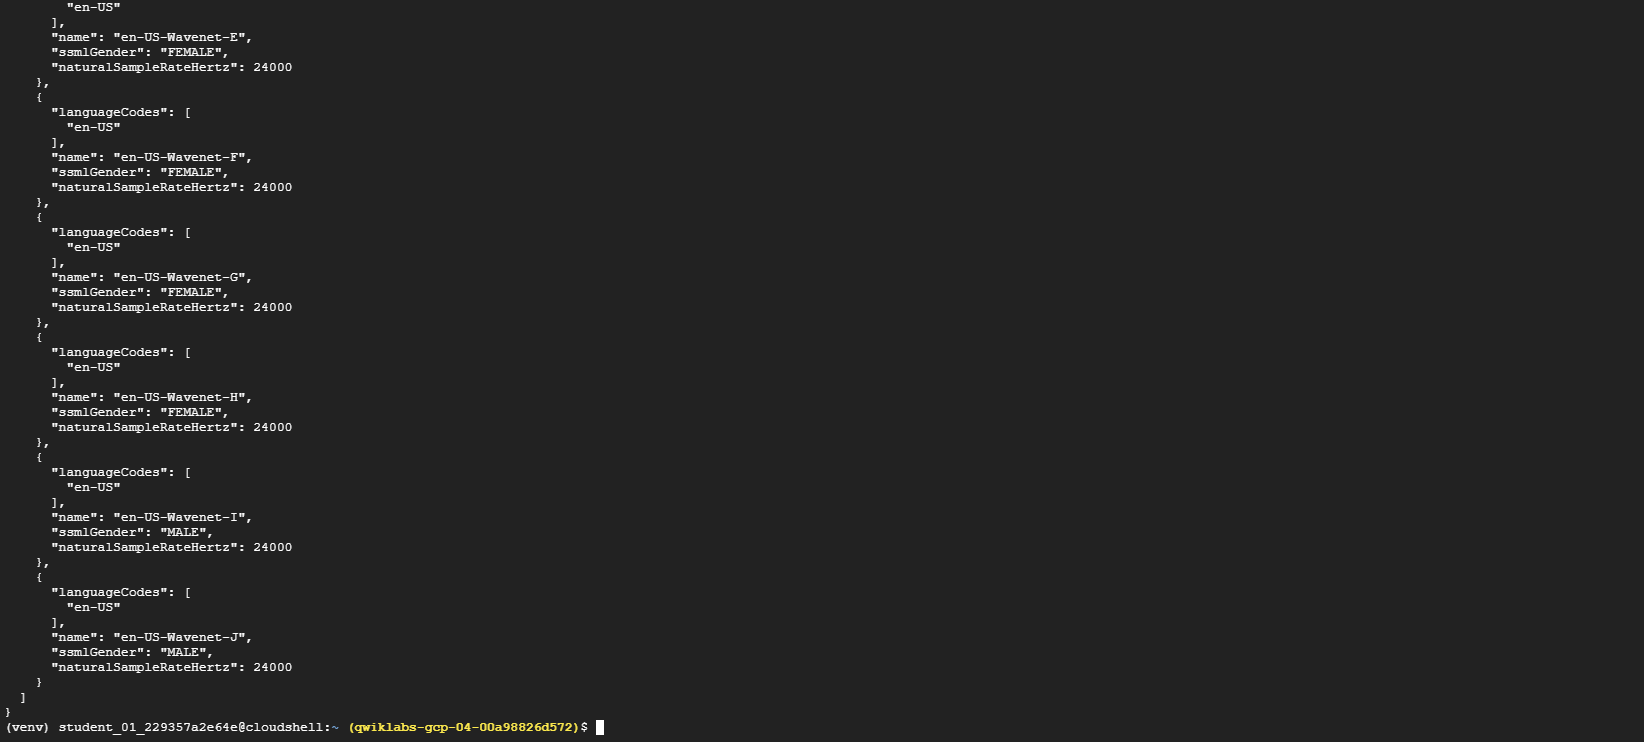
Task 5. Create synthetic speech from text
Now that you’ve seen how to get the names of voices to speak your text, it’s time to create some synthetic speech!
For this, you build your request to the Text-to-Speech API in a text file titled synthesize-text.json.
-
Create this file in Cloud Shell by running the following command:
touch synthesize-text.json -
Using a line editor (for example nano, vim, or emacs) or the Cloud Shell code editor, add the following code to
synthesize-text.json:{ "input":{ "text":"Cloud Text-to-Speech API allows developers to include natural-sounding, synthetic human speech as playable audio in their applications. The Text-to-Speech API converts text or Speech Synthesis Markup Language (SSML) input into audio data like MP3 or LINEAR16 (the encoding used in WAV files)." }, "voice":{ "languageCode":"en-gb", "name":"en-GB-Standard-A", "ssmlGender":"FEMALE" }, "audioConfig":{ "audioEncoding":"MP3" } } -
Save the file and exit the line editor.
The JSON-formatted request body provides three objects:
- The input object provides the text to translate into synthetic speech.
- The voice object specifies the voice to use for the synthetic speech.
- The audioConfig object tells the Text-to-Speech API what kind of audio encoding to send back.
-
Use the following code to call the Text-to-Speech API using the curl command:
 curl -H "Authorization: Bearer "$(gcloud auth application-default print-access-token) \
     -H "Content-Type: application/json; charset=utf-8" \
     -d @synthesize-text.json "https://texttospeech.googleapis.com/v1/text:synthesize" \
     > synthesize-text.txt
The output of this call is saved to a file called
synthesize-text.txt. -
Open the
synthesize-text.txtfile. Notice that the Text-to-Speech API provides the audio output in base64-encoded text assigned to theaudioContentfield, similar to what’s shown below:{ "audioContent": "//NExAASGoHwABhGudEACdzqFXfRE4EY3AACkD/zX4ADf/6J/[...]" }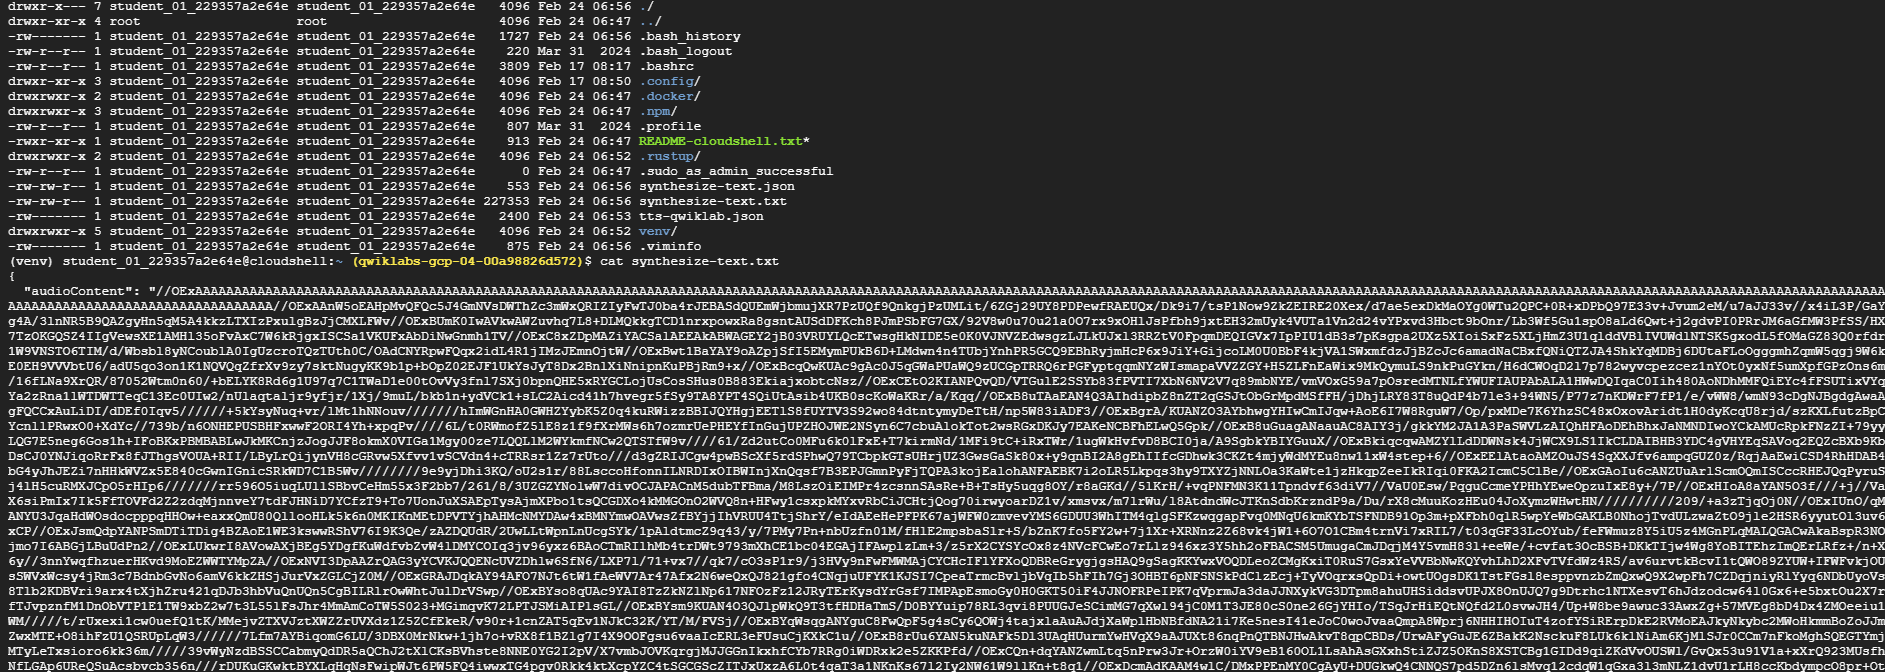
To translate the response into audio, you need to select the audio data it contains and decode it into an audio file - for this lab, MP3. Although there are many ways that you can do this, in this lab you’ll use some simple Python code.
-
Create a file named
tts_decode.py:touch tts_decode.py -
Using a line editor (for example nano, vim, or emacs) or the Cloud Shell code editor, add the following code into
tts_decode.py:import argparse from base64 import decodebytes import json def decode_tts_output(input_file, output_file): with open(input_file) as input: response = json.load(input) audio_data = response['audioContent'] with open(output_file, "wb") as new_file: new_file.write(decodebytes(audio_data.encode('utf-8'))) if __name__ == '__main__': parser = argparse.ArgumentParser(description="Decode output from Cloud Text-to-Speech") parser.add_argument('--input', help='The response from the Text-to-Speech API.', required=True) parser.add_argument('--output', help='The name of the audio file to create', required=True) args = parser.parse_args() decode_tts_output(args.input, args.output)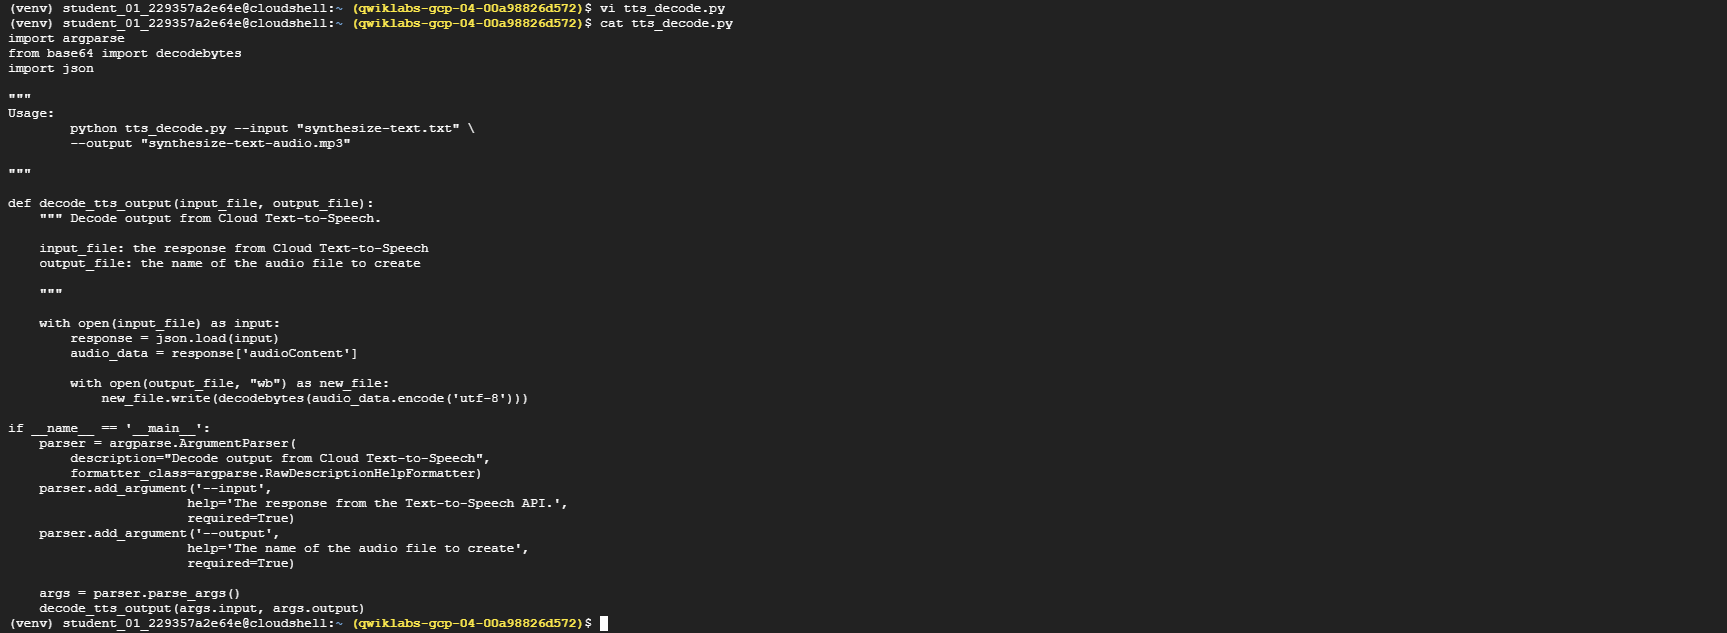
Save
tts_decode.pyand exit the line editor.Now, to create an audio file from the response you received from the Text-to-Speech API, run the following command from Cloud Shell:
python tts_decode.py --input "synthesize-text.txt" --output "synthesize-text-audio.mp3"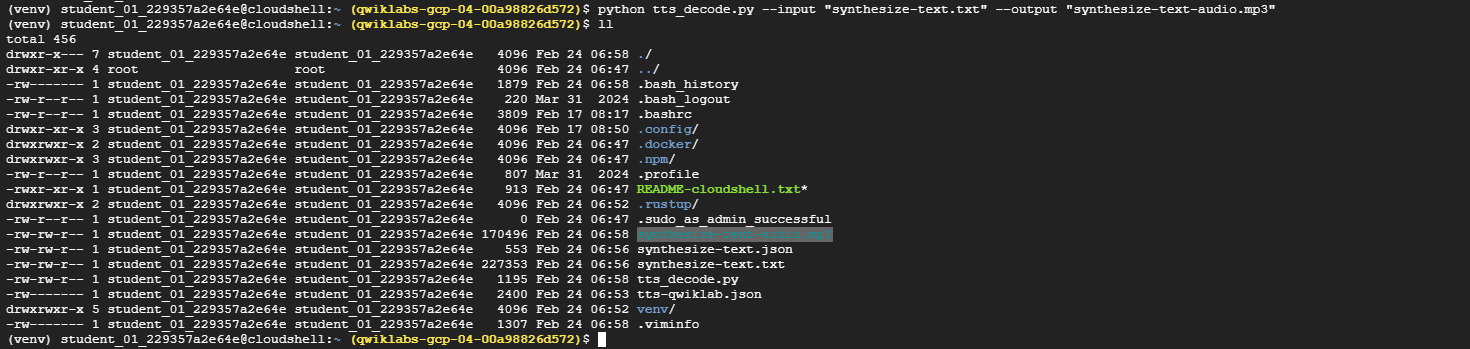
This creates a new MP3 file named
synthesize-text-audio.mp3.Create a new file called
index.html:touch index.htmlUsing a line editor, add the following code into
index.html:<html> <body> <h1>Cloud Text-to-Speech codelab</h1> <p>Output from synthesizing text:</p> <audio controls> <source src="synthesize-text-audio.mp3" /> </audio> </body> </html>
-
Start a simple Python HTTP server:
python -m http.server 8080 - Finally, click Web Preview.
-
Click Web Preview and select Preview on port 8080 to listen to the audio. In the new browser window, you should see something like the following:
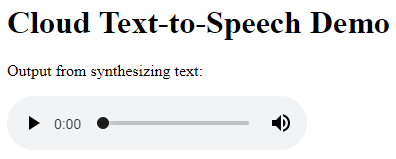
-
Play the audio embedded on the page. You’ll hear the synthetic voice speak the text that you provided to it!
- When you’re done listening to the audio files, you can shut down the HTTP server by pressing CTRL+C in Cloud Shell.
Task 6. Create synthetic speech from SSML
In addition to using text, you can also provide input to the Text-to-Speech API in the form of Speech Synthesis Markup Language (SSML). SSML defines an XML format for representing synthetic speech. Using SSML input, you can more precisely control pauses, emphasis, pronunciation, pitch, speed, and other qualities in the synthetic speech output.
-
First, build your request to the Text-to-Speech API in a text file titled
synthesize-ssml.json. Create this file in Cloud Shell by running the following command:touch synthesize-ssml.json -
Using a line editor (for example
nano,vim, oremacs) or the Cloud Shell code editor, paste the following JSON intosynthesize-ssml.json:{ "input":{ "ssml":"<speak><s> <emphasis level=\"moderate\">Cloud Text-to-Speech API</emphasis> allows developers to include natural-sounding <break strength=\"x-weak\"/> synthetic human speech as playable audio in their applications.</s> <s>The Text-to-Speech API converts text or <prosody rate=\"slow\">Speech Synthesis Markup Language</prosody> <say-as interpret-as=\"characters\">SSML</say-as> input into audio data like <say-as interpret-as=\"characters\">MP3</say-as> or <sub alias=\"linear sixteen\">LINEAR16</sub> <break strength=\"weak\"/> (the encoding used in <sub alias=\"wave\">WAV</sub> files).</s></speak>" }, "voice":{ "languageCode":"en-gb", "name":"en-GB-Standard-A", "ssmlGender":"FEMALE" }, "audioConfig":{ "audioEncoding":"MP3" } }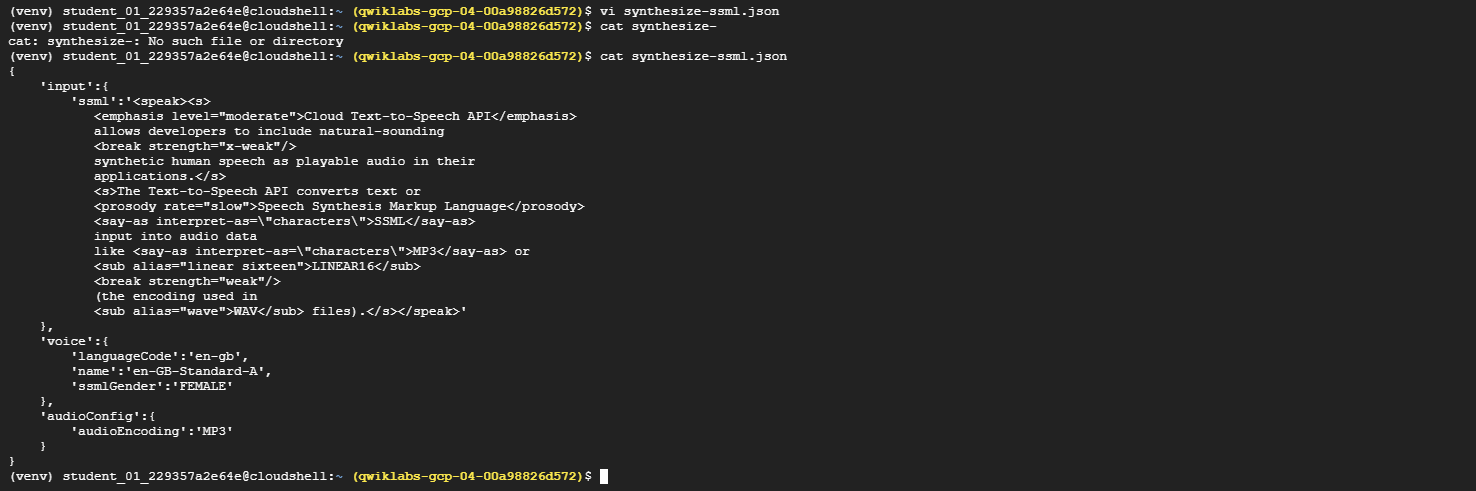
Notice that the
inputobject of the JSON payload includes anssmlfield instead of atextfield. Thessmlfield contains XML-formatted content with the<speak>element as its root. Each of the elements present in this XML representation of the input affects the output of the synthetic speech.Specifically, the elements in this sample have the following effects:
<s>contains a sentence.<emphasis>adds stress on the enclosed word or phrase.<break>inserts a pause in the speech.<prosody>customizes the pitch, speaking rate, or volume of the enclosed text, as specified by therate,pitch, orvolumeattributes.<say-as>provides more guidance about how to interpret and then say the enclosed text.<sub>specifies a substitution value to speak for the enclosed text.
Note: You can see the full list of SSML elements supported by Cloud Text-to-Speech by reviewing the SSML reference.
-
In Cloud Shell, use the following command to call the Text-to-Speech API and save the output to a file called
synthesize-ssml.txt:curl -H "Authorization: Bearer "$(gcloud auth application-default print-access-token) \ -H "Content-Type: application/json; charset=utf-8" \ -d @synthesize-ssml.json "https://texttospeech.googleapis.com/v1/text:synthesize" \ > synthesize-ssml.txtAgain, you need to decode the output from the Text-to-Speech API before you can hear the audio.
-
Run the following command to generate an audio file named
synthesize-ssml-audio.mp3using thetts_decode.pyutility that you created previously:python tts_decode.py --input "synthesize-ssml.txt" --output "synthesize-ssml-audio.mp3"
-
Next, open the
index.htmlfile that you created earlier. Replace the contents of the file with the following HTML:<html> <body> <h1>Cloud Text-to-Speech Demo</h1> <p> Output from synthesizing text: </p> <audio controls> <source src="synthesize-text-audio.mp3" /> </audio> <p> Output from synthesizing SSML: </p> <audio controls> <source src="synthesize-ssml-audio.mp3" /> </audio> </body> </html>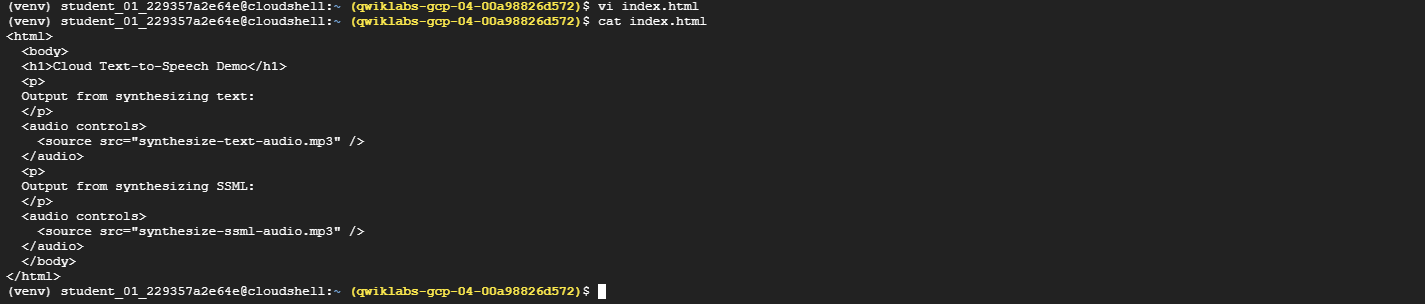
-
Then, start a simple Python HTTP server from the Cloud Shell command prompt:
python -m http.server 8080 -
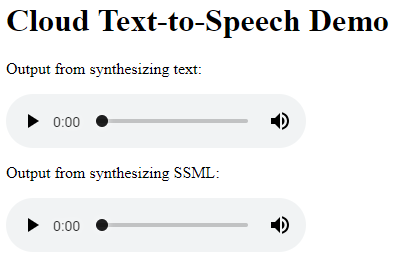
As before, click Web Preview and then select the port number from the displayed menu.
-
Play the two embedded audio files. Notice the differences in the SSML output: although both audio files say the same words, the SSML output speaks them a bit differently, adding pauses and different pronunciations for abbreviations.
Task 7. Configure audio output and device profiles
Beyond SSML, you can provide even more customization to your synthetic speech output. You can specify other audio encodings, change the pitch, and optimize the output for specific hardware.
Build your request to the Text-to-Speech API in a text file titled synthesize-with-settings.json:
-
Create a file named
synthesize-with-settings.json:touch synthesize-with-settings.json -
Paste the following JSON into
synthesize-with-settings.json:{ "input":{ "text":"The Text-to-Speech API is ideal for any application that plays audio of human speech to users." }, "voice":{ "languageCode":"en-us", "name":"en-GB-Standard-A", "ssmlGender":"FEMALE" }, "audioConfig":{ "speakingRate": 1.15, "pitch": -2, "audioEncoding":"OGG_OPUS", "effectsProfileId": ["headphone-class-device"] } }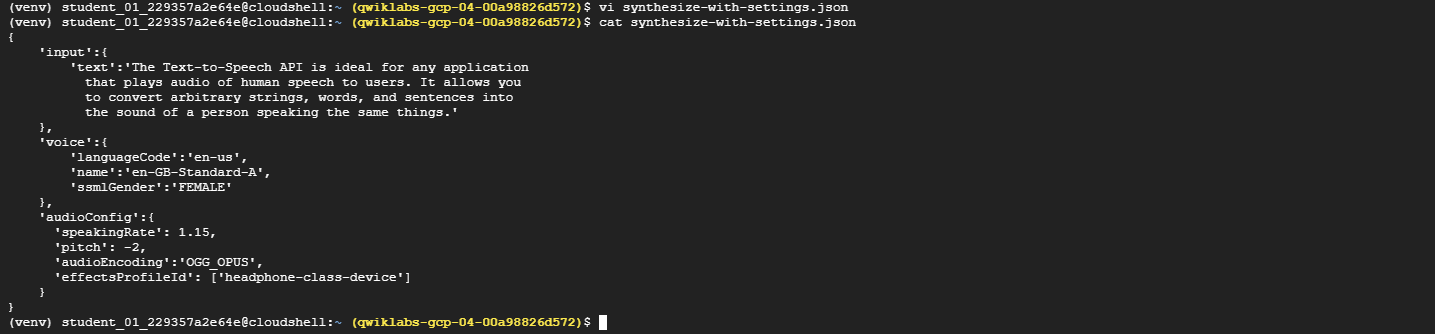
-
Save the file and exit the line editor.
Looking at this JSON payload, you notice that the audioConfig object contains some additional fields now:
- The
speakingRatefield specifies a speed at which the speaker says the voice. A value of1.0is the normal speed for the voice,0.5is half that fast, and2.0is twice as fast. - The
pitchfield specifies a difference in tone to speak the words. The value here specifies a number of semitones lower (negative) or higher (positive) to speak the words. - The
audioEncodingfield specifies the audio encoding to use for the data. The accepted values for this field areLINEAR16,MP3, andOGG_OPUS. - The
effectsProfileIdfield requests that the Text-to-Speech API optimizes the audio output for a specific playback device. The API applies an predefined audio profile to the output that enhances the audio quality on the specified class of devices.
Note: The Audio Profiles feature is in Beta release status. Review the guide for details about how to use it in your application. All other settings described here are generally available for normal use in your application.
- The
-
Call the API using
curl:curl -H "Authorization: Bearer "$(gcloud auth application-default print-access-token) \ -H "Content-Type: application/json; charset=utf-8" \ -d @synthesize-with-settings.json "https://texttospeech.googleapis.com/v1beta1/text:synthesize" \ > synthesize-with-settings.txtThe output of this call is saved to a file called
synthesize-with-settings.txt. -
Run the following command to generate an audio file named
synthesize-with-settings-audio.mp3from the output received from the Text-to-Speech API:python tts_decode.py --input "synthesize-with-settings.txt" --output "synthesize-with-settings-audio.ogg"
-
Next open the
index.htmlfile that you created earlier and replace the contents of the file with the following HTML:<html> <body> <h1>Cloud Text-to-Speech Demo</h1> <p>Output from synthesizing text:</p> <audio controls> <source src="synthesize-text-audio.mp3" /> </audio> <p>Output from synthesizing SSML:</p> <audio controls> <source src="synthesize-ssml-audio.mp3" /> </audio> <p>Output with audio settings:</p> <audio controls> <source src="synthesize-with-settings-audio.ogg" /> </audio> </body> </html> -
Now, restart the Python HTTP server from the Cloud Shell command prompt:
python -m http.server 8080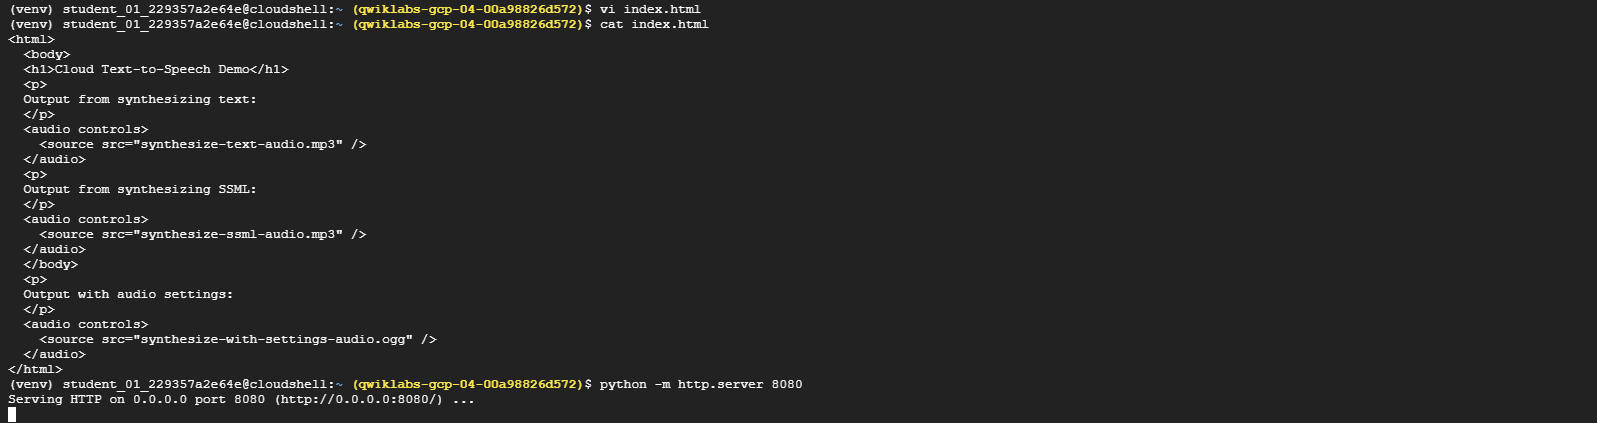
-
As before, click Web Preview then select the port number from the displayed menu.
In the new browser window, you should see something like the following:
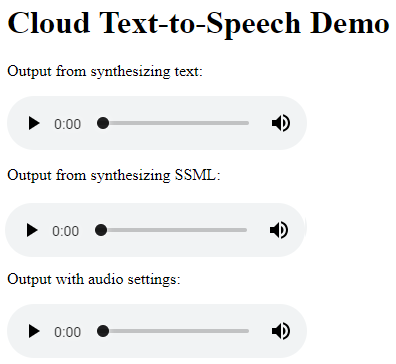
-
Play the third embedded audio file. Notice that the voice on the audio speaks a bit faster and lower than the previous examples.
Congratulations!
You have learned how to create synthetic speech using the Cloud Text-to-Speech API. You learned about:
- Listing all of the synthetic voices available through the Text-to-Speech API
- Creating a Text-to-Speech API request and calling the API with curl, providing both text and SSML
- Configuring the setting for audio output, including specifying a device profile for audio playback
2. TRANSLATE TEXT WITH THE CLOUD TRANSLATION API (GSP049)
Overview
The Cloud Translation API uses Google’s neural machine translation technology to instantly translate texts into more than one hundred languages.
In this lab you use the API to translate text and detect what language the text is using.
Objectives
In this lab you use the Text-to-Speech API to do the following:
- Create a Cloud Translation API request and call the API with curl
- Translate text
- Use the Premium Edition
- Detecting language
Setup and Requirements
Note: Use an Incognito (recommended) or private browser window to run this lab. This prevents conflicts between your personal account and the student account, which may cause extra charges incurred to your personal account.
Note: Use only the student account for this lab. If you use a different Google Cloud account, you may incur charges to that account.
How to start your lab and sign in to Google Cloud Console
- Click the Start Lab button. If you need to pay for the lab, a dialog opens for you to select your payment method. On the left is the Lab Details pane with the following:
- The Open Google Cloud console button
- Time remaining
- The temporary credentials that you must use for this lab
- Other information, if needed, to step through this lab
-
Click Open Google Cloud console (or right-click and select Open Link in Incognito Window if you are running the Chrome browser).
The lab spins up resources, and then opens another tab that shows the Sign in page.
Tip: Arrange the tabs in separate windows, side-by-side.
Note: If you see the Choose an account dialog, click Use Another Account.
-
If necessary, copy the Username below and paste it into the Sign in dialog.
"Username"You can also find the Username in the Lab Details pane.
-
Click Next.
-
Copy the Password below and paste it into the Welcome dialog.
"Password"You can also find the Password in the Lab Details pane.
-
Click Next.
Important: You must use the credentials the lab provides you. Do not use your Google Cloud account credentials.
Note: Using your own Google Cloud account for this lab may incur extra charges.
-
Click through the subsequent pages:
- Accept the terms and conditions.
- Do not add recovery options or two-factor authentication (because this is a temporary account).
- Do not sign up for free trials.
After a few moments, the Google Cloud console opens in this tab.
Note: To access Google Cloud products and services, click the Navigation menu or type the service or product name in the Search field.
Active Cloud Shell
Cloud Shell is a virtual machine that is loaded with development tools. It offers a persistent 5GB home directory and runs on the Google Cloud. Cloud Shell provides command-line access to your Google Cloud resources.
-
Click Activate Cloud Shell at the top of the Google Cloud console.
- Click through the following windows:
- Continue through the Cloud Shell information window.
- Authorize Cloud Shell to use your credentials to make Google Cloud API calls.
When you are connected, you are already authenticated, and the project is set to your Project_ID,
PROJECT_ID. The output contains a line that declares the Project_ID for this session:Your Cloud Platform project in this session is set to "PROJECT_ID"gcloud is the command-line tool for Google Cloud. It comes pre-installed on Cloud Shell and supports tab-completion.
- (Optional) You can list the active account name with this command:
gcloud auth list -
Click Authorize.
Output:
ACTIVE: * ACCOUNT: "ACCOUNT" To set the active account, run: $ gcloud config set account `ACCOUNT` -
(Optional) You can list the project ID with this command:
gcloud config list projectOutput:
 [core]
 project = "PROJECT_ID"
Note: For full documentation of gcloud, in Google Cloud, refer to the gcloud CLI overview guide.
Set the region and zone
-
Run the following command to set the project region for this lab:
 export REGION=REGION
 gcloud config set compute/region $REGION
Learn more from the Regions and zones documentation.
Note: When you run gcloud on your own machine, the config settings are persisted across sessions. But in Cloud Shell, you need to set this for every new session or reconnection.
Task 1. Create an API key
Since later in this lab you use curl to send a request to the Translation API, you need to generate an API key to pass in your request URL.
-
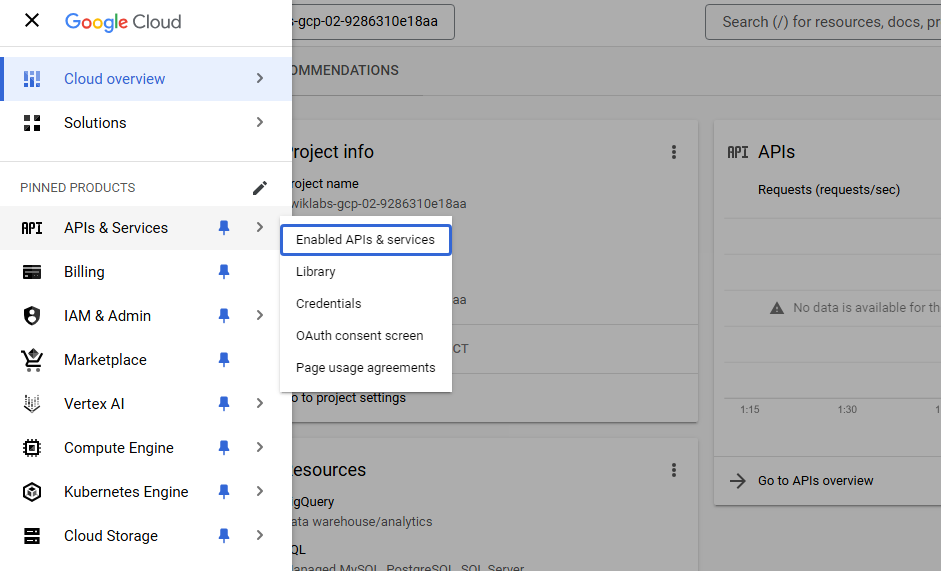
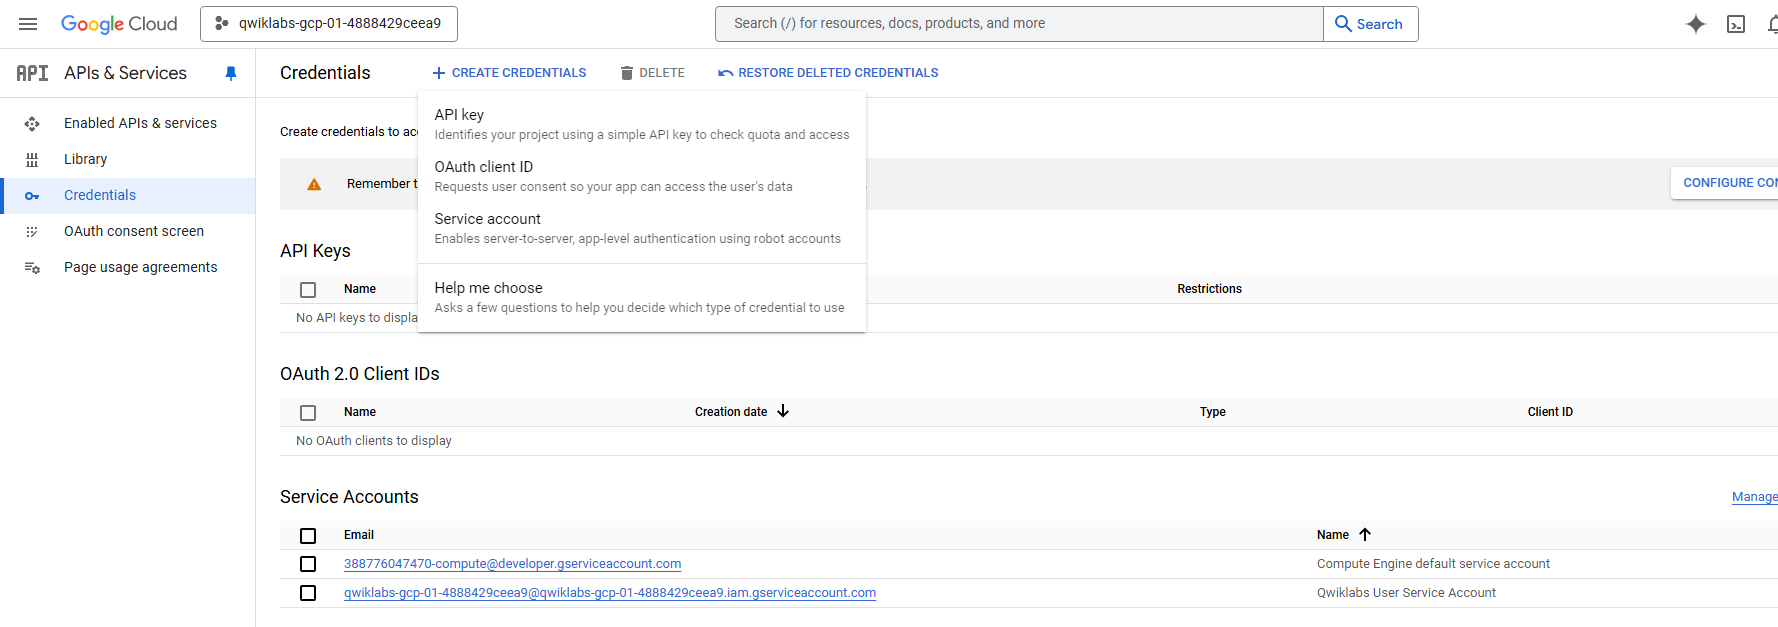
To create an API key, in the Navigation menu (Navigation menu icon), click APIs & services > Credentials.
-
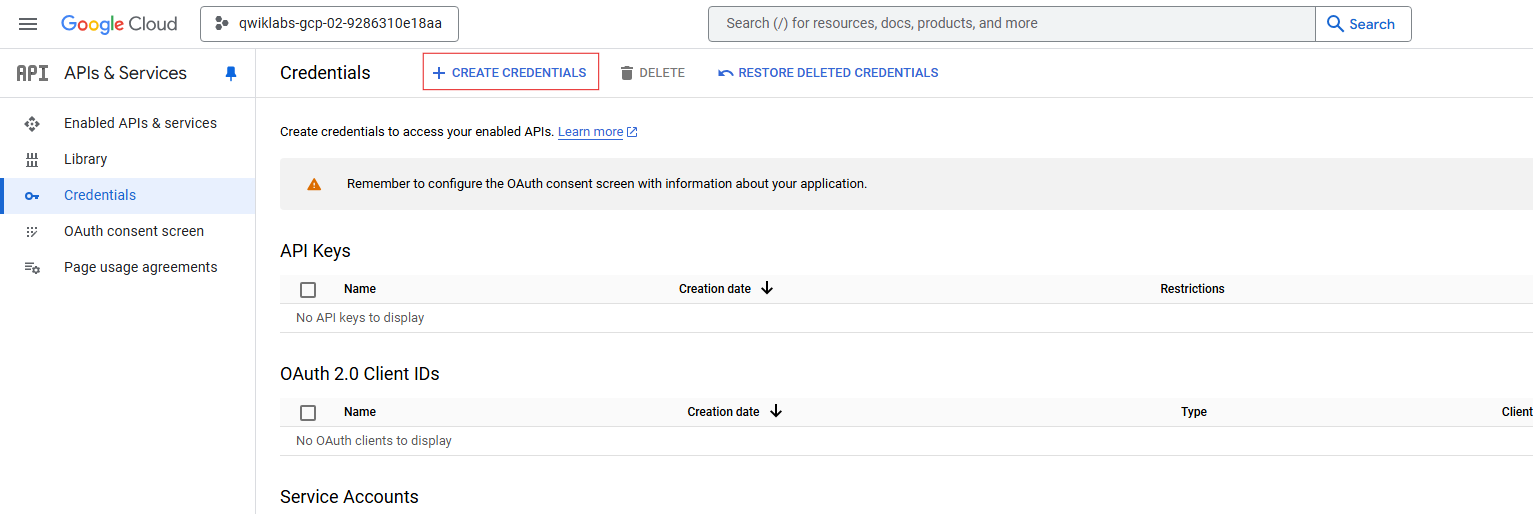
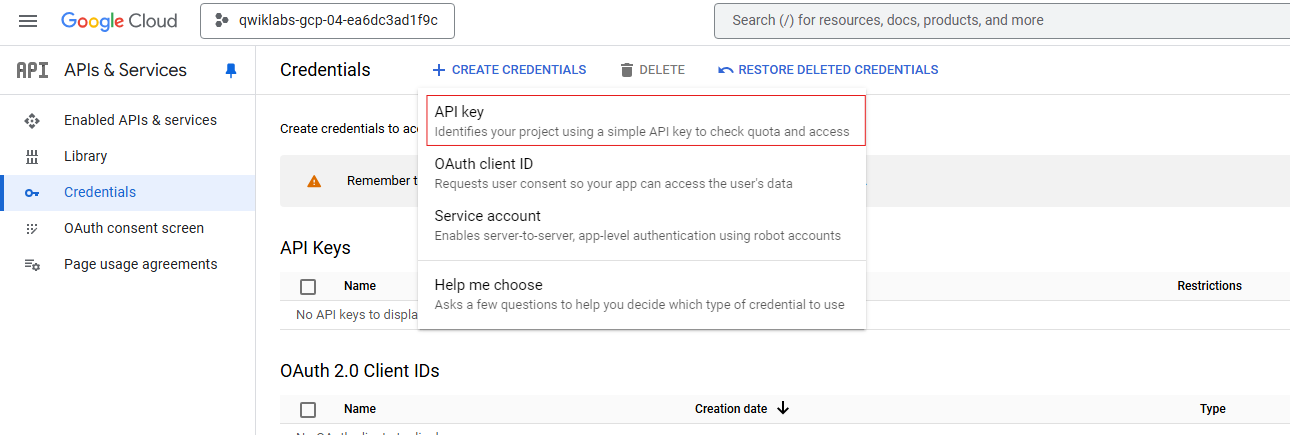
Click +CREATE CREDENTIALS.
-
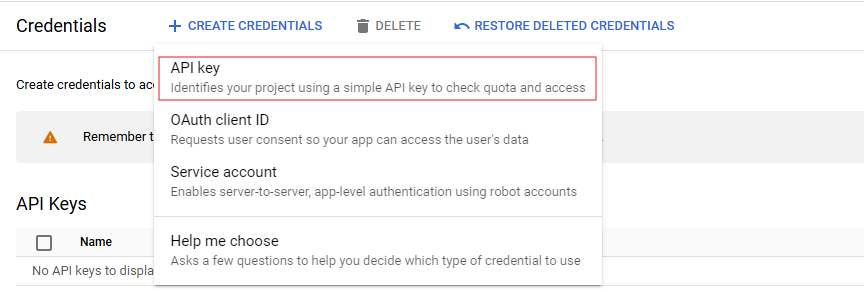
In the drop-down menu, select API key.
-
Copy the key you just generated.
Next, save it to an environment variable to avoid having to insert the value of your API key in each request.
-
Run the following in Cloud Shell. Be sure to replace
<your_api_key>with the key you just copied:export API_KEY=YOUR_API_KEY
Task 2. Translate text
In this example, you translate the string “My name is Steve” into Spanish.
-
Pass the text to be translated, along with the API key environment variable, to the Translation API with the following
curlcommand:TEXT="My%20name%20is%20Steve" curl "https://translation.googleapis.com/language/translate/v2?target=es&key=${API_KEY}&q=${TEXT}"Your response should look like this:
  {
      "data": {
          "translations": [
              {
                  "translatedText": "Mi nombre es Steve",
                  "detectedSourceLanguage": "en"
              }
          ]
      }
  }
In the response, you can see the translated text and the source language that the API detected.
Note: Premium Mode The Google Cloud Translation API uses a standard edition model for most translation tasks. Google has augmented its translation service to use a more robust Neural Machine Translation System. To learn more about using this premium model, refer to the Cloud Translation Documentation.
Task 3. Detect the language
In addition to translating text, the Translation API can also detect the language of the text. In this example, you detect the language of two strings.
-
Pass the text to be examined, along with the API key environment variable, to the Translation API with the following
curlcommand:TEXT_ONE="Meu%20nome%20é%20Steven" TEXT_TWO="日本のグーグルのオフィスは、東京の六本木ヒルズにあります" curl -X POST "https://translation.googleapis.com/language/translate/v2/detect?key=${API_KEY}" -d "q=${TEXT_ONE}" -d "q=${TEXT_TWO}"Your response should look like this:
  {
      "data": {
          "detections": [
              [
                  {
                      "isReliable": false,
                      "language": "pt",
                      "confidence": 1
                  }
              ],
              [
                  {
                      "language": "ja",
                      "isReliable": false,
                      "confidence": 1
                  }
              ]
          ]
      }
  }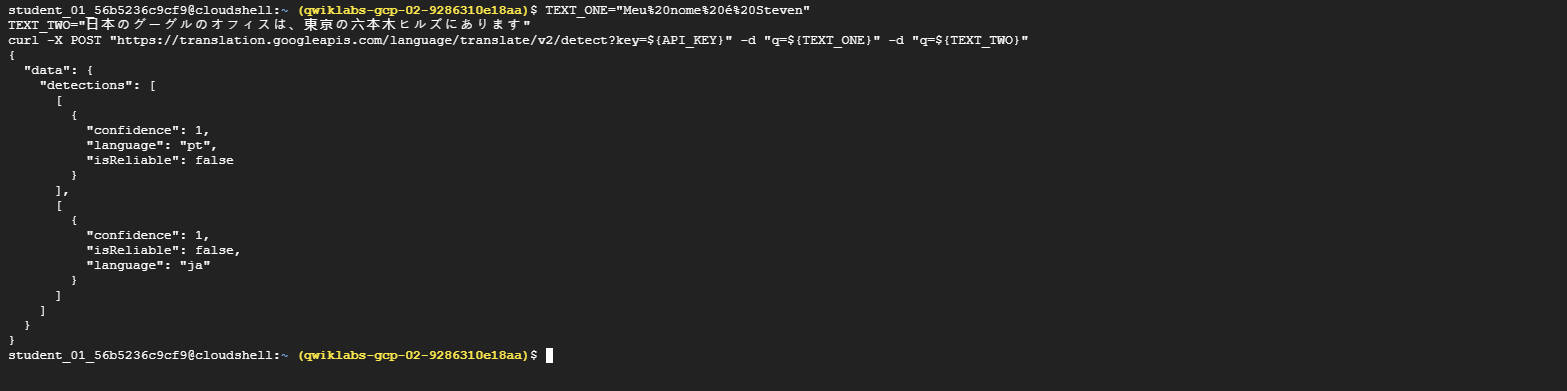
The languages returned by this sample are
"pt"and"ja". These are the ISO-639-1 identifiers for Portuguese and Japanese. The list of languages supported by the Translation API includes all possible language codes that can be returned.
Congratulations!
You’ve learned how to translate text with the Cloud Translation API!
3. SPEECH TO TEXT TRANSCRIPTION WITH THE CLOUD SPEECH API (GSP048)
Overview
The Speech-to-Text API lets you transcribe audio speech files to text files in over 80 languages.
In this lab you send an audio file to the Speech API for transcription.
Objectives
In this lab you use the Speech-to-Text API to do the following:
- Creating a Speech-to-Text API request and calling the API with curl
- Calling the Speech-to-Text API with audio files in a different language
Setup and Requirements
Note: Use an Incognito (recommended) or private browser window to run this lab. This prevents conflicts between your personal account and the student account, which may cause extra charges incurred to your personal account.
Note: Use only the student account for this lab. If you use a different Google Cloud account, you may incur charges to that account.
How to start your lab and sign in to Google Cloud Console
- Click the Start Lab button. If you need to pay for the lab, a dialog opens for you to select your payment method. On the left is the Lab Details pane with the following:
- The Open Google Cloud console button
- Time remaining
- The temporary credentials that you must use for this lab
- Other information, if needed, to step through this lab
-
Click Open Google Cloud console (or right-click and select Open Link in Incognito Window if you are running the Chrome browser).
The lab spins up resources, and then opens another tab that shows the Sign in page.
Tip: Arrange the tabs in separate windows, side-by-side.
Note: If you see the Choose an account dialog, click Use Another Account.
-
If necessary, copy the Username below and paste it into the Sign in dialog.
"Username"You can also find the Username in the Lab Details pane.
-
Click Next.
-
Copy the Password below and paste it into the Welcome dialog.
"Password"You can also find the Password in the Lab Details pane.
-
Click Next.
Important: You must use the credentials the lab provides you. Do not use your Google Cloud account credentials.
Note: Using your own Google Cloud account for this lab may incur extra charges.
-
Click through the subsequent pages:
- Accept the terms and conditions.
- Do not add recovery options or two-factor authentication (because this is a temporary account).
- Do not sign up for free trials.
After a few moments, the Google Cloud console opens in this tab.
Note: To access Google Cloud products and services, click the Navigation menu or type the service or product name in the Search field.
Task 1: Create an API Key
Since you use curl to send a request to the Speech-to-Text API, you need to generate an API key to pass in your request URL.
-
To create an API key, on the Navigation menu click APIs & services > Credentials.
-
Click Create credentials and select API key.
- Copy and record the key you just generated to use later in this lab.
-
Click Close.
Now save your key to an environment variable to avoid having to insert the value of your API key in each request.
-
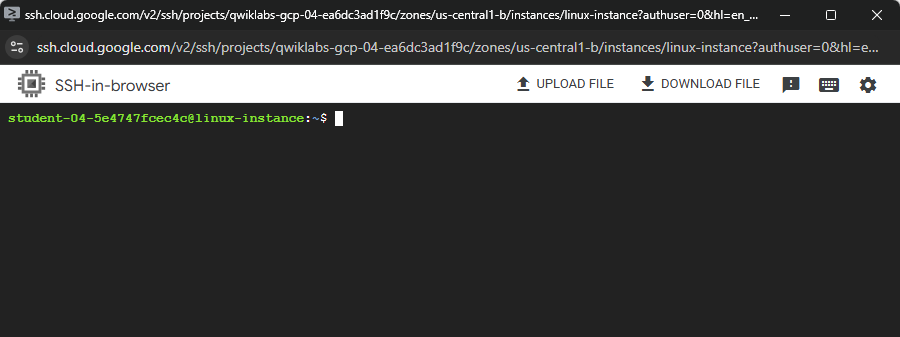
To perform the next steps, connect to the Linux instance provisioned for you via SSH:
On the Navigation menu, click Compute Engine > VM Instances.
Notice the linux-instance VM in the VM instances list. VM details are to the right of the VM name.

-
Click SSH to the right of the linux-instance VM name. An interactive shell opens. Use this to perform the next operations.
-
In the shell (SSH) run the following, replacing
<your_api_key>with the key you just copied:export API_KEY=<YOUR_API_KEY>
Task 2: Create your API Request
Note: This lab uses a pre-recorded file available on Cloud Storage: gs://cloud-samples-data/speech/brooklyn_bridge.flac. Before sending it to the Speech-to-Text API, you can listen to this file.
-
Build your request to the API in a
request.jsonfile:touch request.json -
Open the file using your preferred command-line editor (
nano,vim,emacs) and add the following:{ "config": { "encoding":"FLAC", "languageCode": "en-US" }, "audio": { "uri":"gs://cloud-samples-data/speech/brooklyn_bridge.flac" } }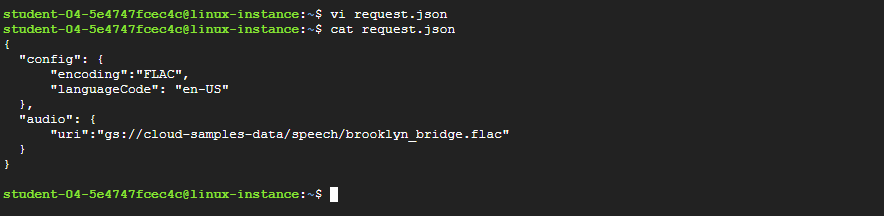
-
Save the file as needed.
The request body has a
configandaudioobject:In
config, you tell the Speech-to-Text API how to process the request:- The
encodingparameter tells the API which type of audio encoding you’re using.FLACis used for.rawfiles. languageCodedefaults to English if left out of the request.
There are other parameters you can add to your
configobject, butencodingis the only required one.In the
audioobject, you pass the API the uri of the audio file, which is stored in Cloud Storage for this lab. - The
Task 3: Call the Speech-to-Text API
-
Pass your request body, along with the API key environment variable, to the API with the following
curlcommand:curl -s -X POST -H "Content-Type: application/json" --data-binary @request.json \ "https://speech.googleapis.com/v1/speech:recognize?key=${API_KEY}" > result.jsonYour response is stored in a file named
result.json. -
To see the contents of the file:
cat result.jsonThe response should look like this:
{ "results": [ { "alternatives": [ { "transcript": "how old is the Brooklyn Bridge", "confidence": 0.98216057 } ], "resultEndTime": "1.770s", "languageCode": "en-us" } ], "totalBilledTime": "15s" }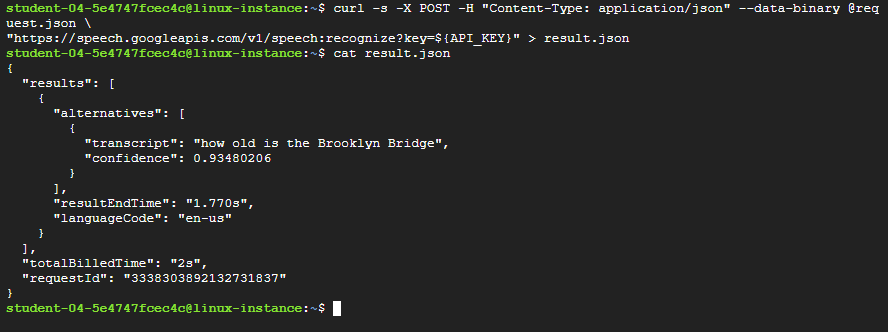
The
transcriptvalue returns the Speech API’s text transcription of your audio file, andconfidenceindicates how sure the API is about the transcription accuracy.Notice that you called the
syncrecognizemethod in our request above. The Speech-to-Text API supports both synchronous and asynchronous speech to text transcription.In this example a complete audio file was used, but you can also use the
syncrecognizemethod to perform streaming speech to text transcription while the user is still speaking.
Task 4: Speech-to-Text Transcription in Different Languages
The Speech-to-Text API supports transcription in over 100 languages!
You can change the languageCode parameter in request.json. A list of supported languages is available in the Language support guide.
Try a French audio file - (for a preview, listen here):
-
Edit
request.jsonand change the content to:{ "config": { "encoding":"FLAC", "languageCode": "fr" }, "audio": { "uri":"gs://cloud-samples-data/speech/corbeau_renard.flac" } } -
Call the Speech-to-Text API again:
curl -s -X POST -H "Content-Type: application/json" --data-binary @request.json \ "https://speech.googleapis.com/v1/speech:recognize?key=${API_KEY}" > result.jsonSee the results:
cat result.jsonYou should see the following response:
 {
     "results": [
         {
             "alternatives": [
                 {
                     "transcript": "maître corbeau sur un arbre perché Tenait dans son bec un fromage maître Renard par l'odeur alléché lui tint à peu près ce langage et bonjour monsieur du corbeau",
                     "confidence": 0.93855613
                 }
             ],
             "resultEndTime": "12.630s",
             "languageCode": "fr-fr"
         }
     ],
     "totalBilledTime": "15s"
 }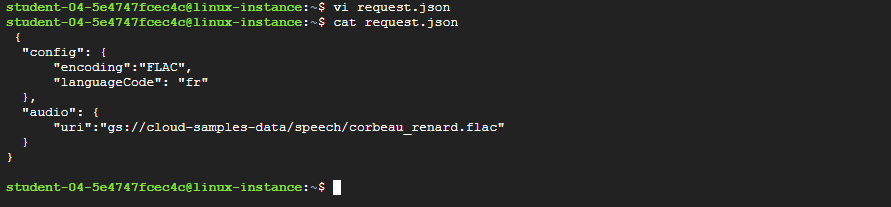
This is a sentence from a popular French children’s tale by Jean de la Fontaine. You can try adding other audio files in Cloud Storage and changing the
languageCodeparameter in your request.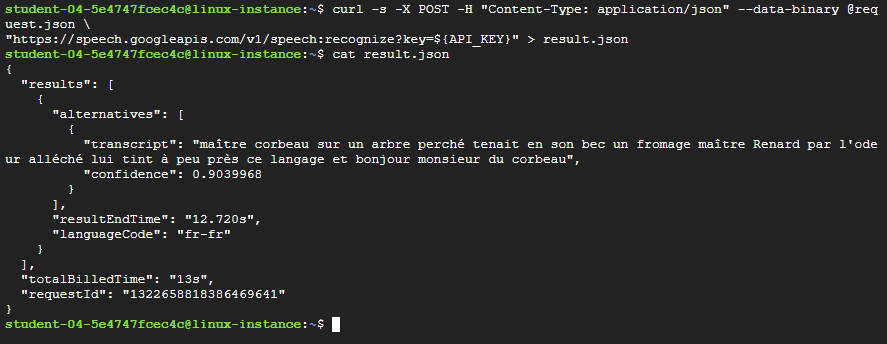
Note: API restrictions and usage limits on Cloud Speech-to-Text are documented in the Quotas and limits resource.
Congratulations!
You’ve performed speech-to-text transcription with the Speech API. You passed the API the Cloud Storage URI of your audio file and reviewed the alternative of passing a base64 encoded string of your audio content.
4. CLOUD SPEECH API 3 WAYS: CHALLENGE LAB (ARC132)
Overview
In a challenge lab you’re given a scenario and a set of tasks. Instead of following step-by-step instructions, you will use the skills learned from the labs in the course to figure out how to complete the tasks on your own! An automated scoring system (shown on this page) will provide feedback on whether you have completed your tasks correctly.
When you take a challenge lab, you will not be taught new Google Cloud concepts. You are expected to extend your learned skills, like changing default values and reading and researching error messages to fix your own mistakes.
To score 100% you must successfully complete all tasks within the time period!
Setup
Note: Use an Incognito (recommended) or private browser window to run this lab. This prevents conflicts between your personal account and the student account, which may cause extra charges incurred to your personal account.
Note: Use only the student account for this lab. If you use a different Google Cloud account, you may incur charges to that account.
Challenge Scenario
You are starting your career as a junior cloud architect. In this role, you have been assigned to work on a team project that requires you to use the Cloud Speech API services in Google Cloud.
You are expected to have the skills and knowledge to complete the tasks that follow.
Your challenge
For this challenge, you are required to transcribe speech to text in different languages using the Cloud Speech API.
You need to:
- Create synthetic speech from text using the Text-to-Speech API.
- Create an API key.
- Perform speech to text transcription with the Cloud Speech API.
- Translate text with the Cloud Translation API.
- Detect a language with the Cloud Translation API.
For this challenge lab, a virtual machine (VM) instance named Instance name has been configured for you to complete tasks 2 through 5.
Each task is described in detail below, good luck!
Task 1: Create an API Key
-
For this task, you need to create an API key to use in this and other tasks when sending a request to the Speech-to-Text API.
-
Save the API key to use in other tasks.
Task 2: Create Synthetic Speech from Text Using the Text-to-Speech API
-
For this task, connect to the VM instance
lab-vmprovisioned for you via SSH. -
Activate the virtual environment using the following command:
source venv/bin/activate -
Using a text editor (such as
nanoorvim), create a file namedsynthesize-text.jsonand paste the following into the file:{ "input":{ "text":"Cloud Text-to-Speech API allows developers to include natural-sounding, synthetic human speech as playable audio in their applications. The Text-to-Speech API converts text or Speech Synthesis Markup Language (SSML) input into audio data like MP3 or LINEAR16 (the encoding used in WAV files)." }, "voice":{ "languageCode":"en-gb", "name":"en-GB-Standard-A", "ssmlGender":"FEMALE" }, "audioConfig":{ "audioEncoding":"MP3" } } -
Call the Text-to-Speech API to synthesize the text from the
synthesize-text.jsonfile and store the result in a file namedsynthesize-text.txt. -
Using a text editor (such as
nanoorvim), create a file namedtts_decode.pyand paste the following code into that file:import argparse from base64 import decodebytes import json def decode_tts_output(input_file, output_file): """ Decode output from Cloud Text-to-Speech. """ with open(input_file) as input: response = json.load(input) audio_data = response['audioContent'] with open(output_file, "wb") as new_file: new_file.write(decodebytes(audio_data.encode('utf-8'))) if __name__ == '__main__': parser = argparse.ArgumentParser(description="Decode output from Cloud Text-to-Speech") parser.add_argument('--input', help='The response from the Text-to-Speech API.', required=True) parser.add_argument('--output', help='The name of the audio file to create', required=True) args = parser.parse_args() decode_tts_output(args.input, args.output) -
Now, to create an audio file using the response you received from the Text-to-Speech API, run the following command from Cloud Shell:
python tts_decode.py --input "synthesize-text.txt" --output "synthesize-text-audio.mp3"This creates a new MP3 file named
synthesize-text-audio.mp3. -
Finally, download the audio file via the DOWNLOAD FILE option of the VM instance’s SSH session to listen to it.
Task 3: Perform Speech-to-Text Transcription with the Cloud Speech API
Note: This lab uses a pre-recorded file available on Cloud Storage: gs://cloud-samples-data/speech/corbeau_renard.flac. You can listen to this file.
-
For this task, connect to the VM instance
lab-vmprovisioned for you via SSH. -
Using a text editor (such as
nanoorvim), create a file namedspeech_request.jsonas your API request to transcribe the audio file available at thegs://cloud-samples-data/speech/corbeau_renard.flaclocation to French. -
Call
speech_request.jsonand store the result in a file namedresponse.json.
Task 4: Translate Text with the Cloud Translation API
-
For this task, connect to the VM instance
lab-vmprovisioned for you via SSH. -
Translate the
これは日本語です。sentence to the English language by calling the Cloud Translation API and store the result in thetranslated_response.txtfile.
Task 5: Detect a Language with the Cloud Translation API
-
For this task, connect to the VM instance
lab-vmprovisioned for you via SSH. -
Detect the language of the
Este%é%japonês.sentence by calling the Cloud Translation API and store the result in thedetected_language.txtfile.
Run the following Commands in CloudShell
Solution here
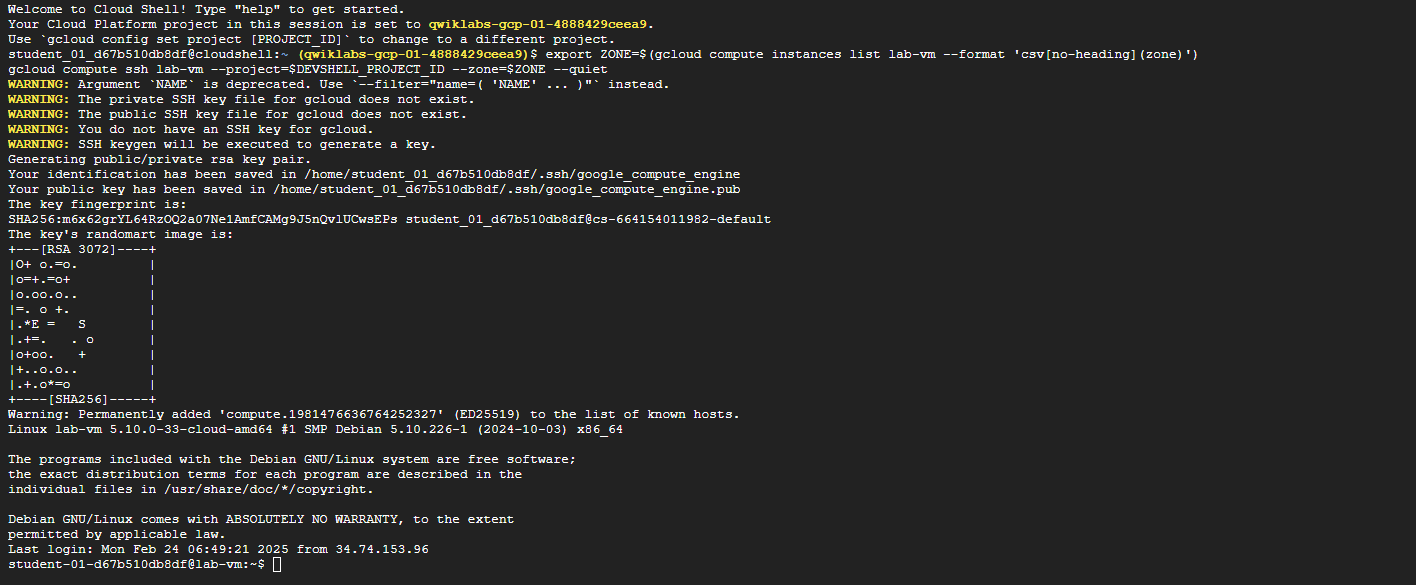
export ZONE=$(gcloud compute instances list lab-vm --format 'csv[no-heading](zone)')
gcloud compute ssh lab-vm --project=$DEVSHELL_PROJECT_ID --zone=$ZONE --quiet
- Go to
Credentialsfrom here
export API_KEY=AIzaSyCYZ2qUCBPx-hmJj7zQWXJTE2OY51q-tyM
export task_2_file_name="synthesize-text.txt"
export task_3_request_file="speech_request.json"
export task_3_response_file="response.json"
export task_4_sentence="これは日本語です。"
export task_4_file="translated_response.txt"
export task_5_sentence="Este%é%japonês."
export task_5_file="detected_response.txt"
curl -LO raw.githubusercontent.com/QUICK-GCP-LAB/2-Minutes-Labs-Solutions/main/Cloud%20Speech%20API%203%20Ways%20Challenge%20Lab/arc132.sh

sudo chmod +x arc132.sh

./arc132.sh
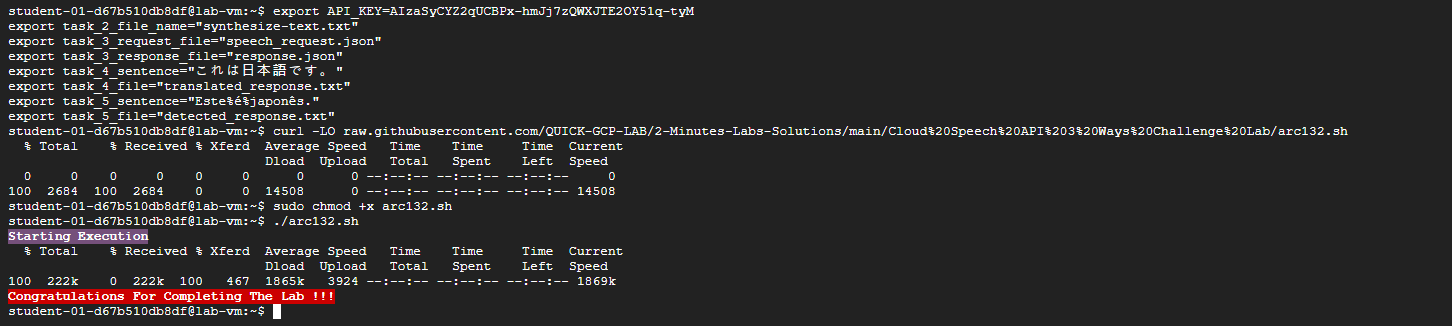
Congratulations!
You have successfully created synthetic speech from text using the Text-to-Speech API, transcribed speech to text using the Cloud Speech API, as well as translated text and detected a language with the Cloud Translation API.